So far, you've cut out all the armor plates and drilled all the holes for your project robot. You're almost ready to bolt everything together. In this project, you will prepare the polycarbonate plates, axles, motors, and other drive system components for assembly and fasten them to the base. You'll get practice in preparing Lexan (no sharp edges, as mentioned in Chapter 4), as well as your first taste of soldering with the motor leads, and cutting steel for the axles.
| Caution: Eye protection is required for all of these operations. Review all of the general power-tool safety protocols described in Chapter 5 of Kickin' Bot, as well as the sections that correspond to the specific tools used below. |
Part 3: Soldering Leads onto the Motors
The motors are supplied without leads, so you will have to either solder a lead directly to the motor terminal or use a crimp connector. Soldering is described in detail below to give you some experience with that procedure. However, you may optionally use flag crimp terminals to make your motor connections, which is described in greater detail below. Caution: Adequate ventilation is essential. Make sure not to inhale the solder fumes. Never blow on any solder joint to speed cooling. Allow the joint to cool on its own.
click on an image to enlarge it
|
|
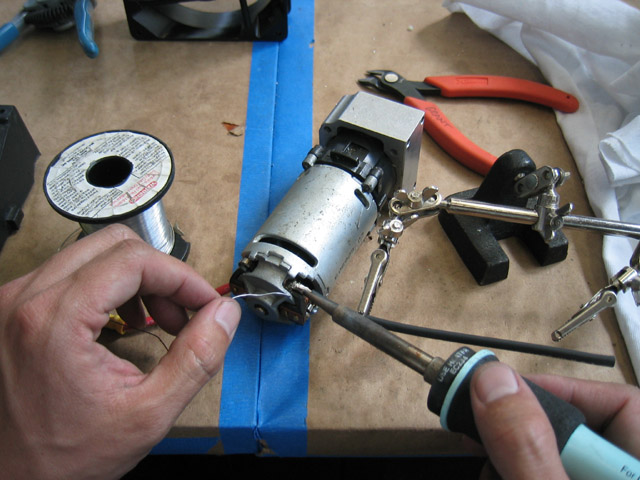
Cut off a 4" long pair of red and black leads of 12 gauge Deans Wet Noodle or Ultra Wire for each motor. Apply solder to the tip of a hot soldering iron (called "wetting the tip"). Touch the tip to one of the motor terminals. After a short while, the solder on the tip should flow to the motor terminal; as this is happening, add more solder so that the terminal has a bright and shiny coating of solder. |
|
|
Using a pair of helping hands (little alligator clips on moveable arms with a weighted base), hold one of the leads out. Apply solder to the lead, just as you did with the motor terminals. |
|
|
Use the helping hands to hold the lead in contact with the terminal. Then hold the soldering iron so that it touches both the lead and the terminal at the same time. Add more solder as solder begins to flow between the terminal and the lead. Remember not to blow on the solder. Allow it to cool on its own. |
|
|
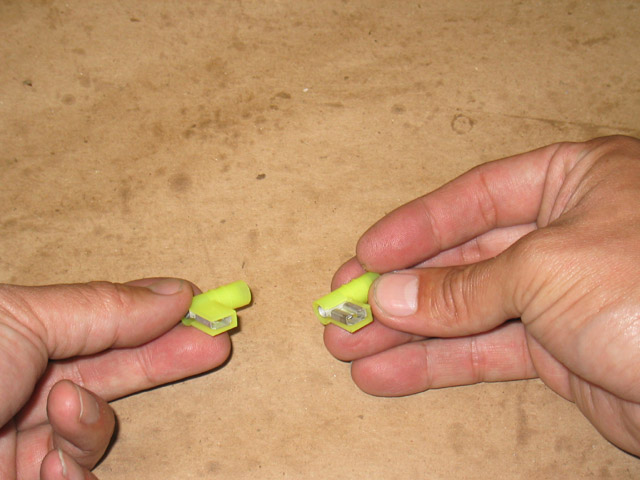
If you're not too hip to soldering, you can alternatively crimp on flag terminals to the motor leads. While not as secure as soldering, the flag terminals provide a simple way to connect the motor leads. |
|
|
The flag terminals push onto the motor's input terminals and should be secured by some secondary means, such as cable ties, as shown. Note that these motors may generate a large amount of heat, and the cable tie may have to be replaced by something more substantial, such as a metal hose clamp. Make sure to protect the wires so that the metal clamp doesn't dig into the insulation and short them out. |
|
|
|
|