In this project, you'll be modifying the West Marine switch that was selected to activate the project robot's master power, making it battle-ready by replacing the big red plastic key with a socket head cap screw. This will allow you to use an Allen key to turn the master power on and off, which should make activation more convenient and reliable. You'll also be wiring the switch into the system by crimping battery terminals onto the battery leads and installing Powerpole connectors for quick battery changes.
| Caution: Eye protection is required for all cutting, drilling, and grinding operations in this project. Caution: Review all of the general power- tool safety protocols described in Chapter 5 of Kickin' Bot (Cutting Metal), as well as the sections that correspond to the specific tools used below. |
Part 1: Modifying the Master Power Switch
The main drawback with the switch is the large red plastic key that's
turned to activate it. This key doesn't make it easy to turn on the robot from outside of the frame. (You'd have
to have a huge, gaping hole or some sort of hatch.) We'll fix this by replacing the head of the key with a socket
head cap screw, allowing you to use an Allen wrench to turn the robot on and off.
click on an image to enlarge it
|
|
Remove the red key from the master power switch. It can only be removed by pulling it straight out when the switch is in the "off" position. |
|
|
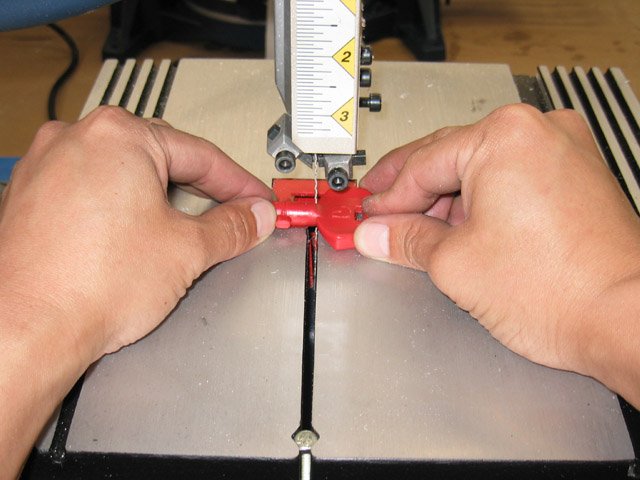
Cut the key on the bandsaw at the base of the head. If the cut edge is too ragged, you can clean it up on the disc sander. |
|
|
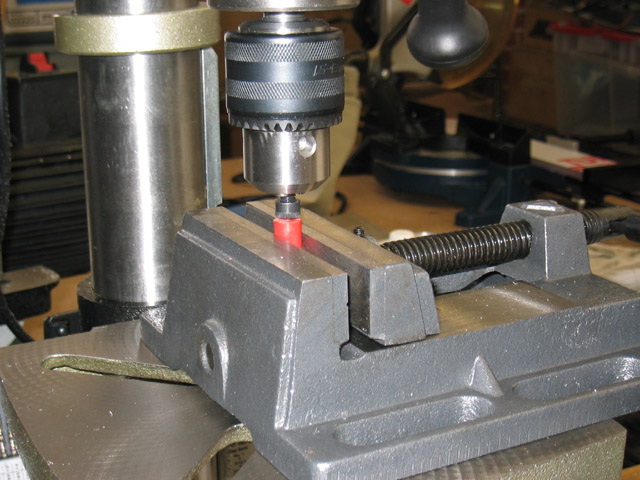
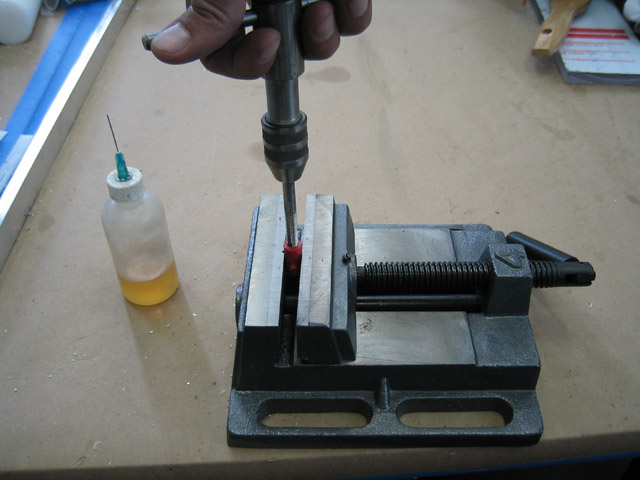
Place the key stub in a drill press vise, making sure that the stub is perfectly vertical. Tighten a 1/4"-20 x 1" long socket cap head screw in the drill chuck to give you a visual reference to line up the stub with the center of the chuck, as shown. Once you confirm that the spacing is equal all around the sides, clamp the drill press vise in place. |
|
|
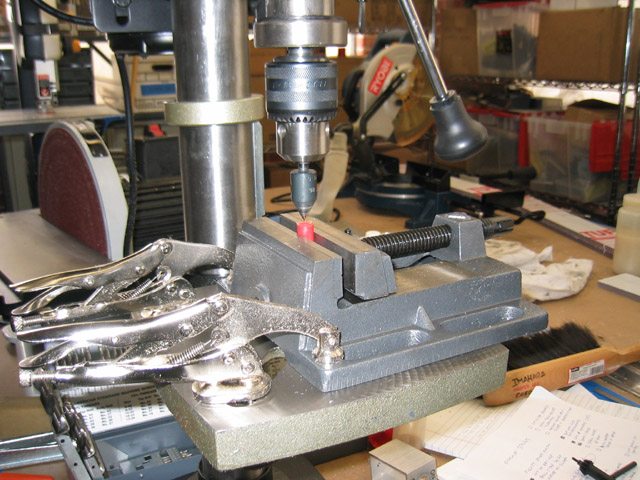
Remove the screw from the chuck and use a countersink or a center drill to make a divot in the exact center of the key stub, which will act like a punch mark to make sure that the drill stays on center. |
|
|
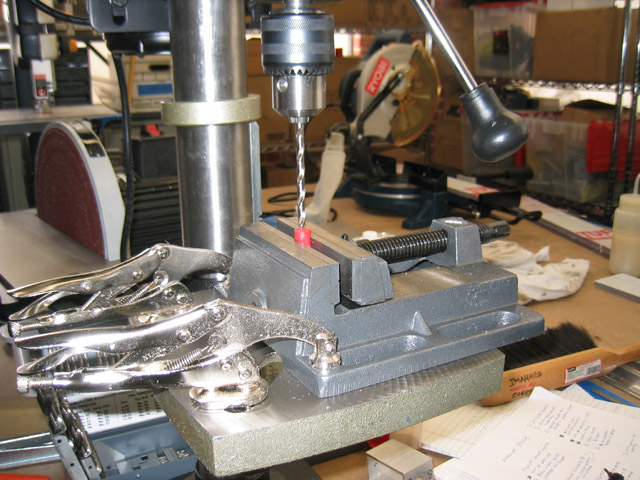
Drill a hole all the way through the key stub with a #7 drill, which is the correct size of a tap drill for a 1/4"-20 thread. Make sure to use adequate lubrication during the drilling process. |
|
|
Tap the hole with a 1/4"-20 tap. Remember to use adequate lubrication. Make sure to tap all the way through the key stub. |
|
|
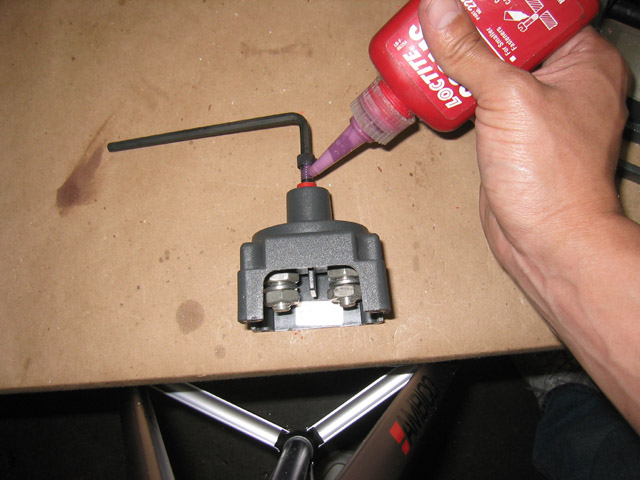
Apply a drop of Loctite to the threads of a 1/4"-20 x 1" long socket cap head screw and tighten it into the key stub. The Loctite should prevent the screw from loosening with repeated usage. |
|
|
|